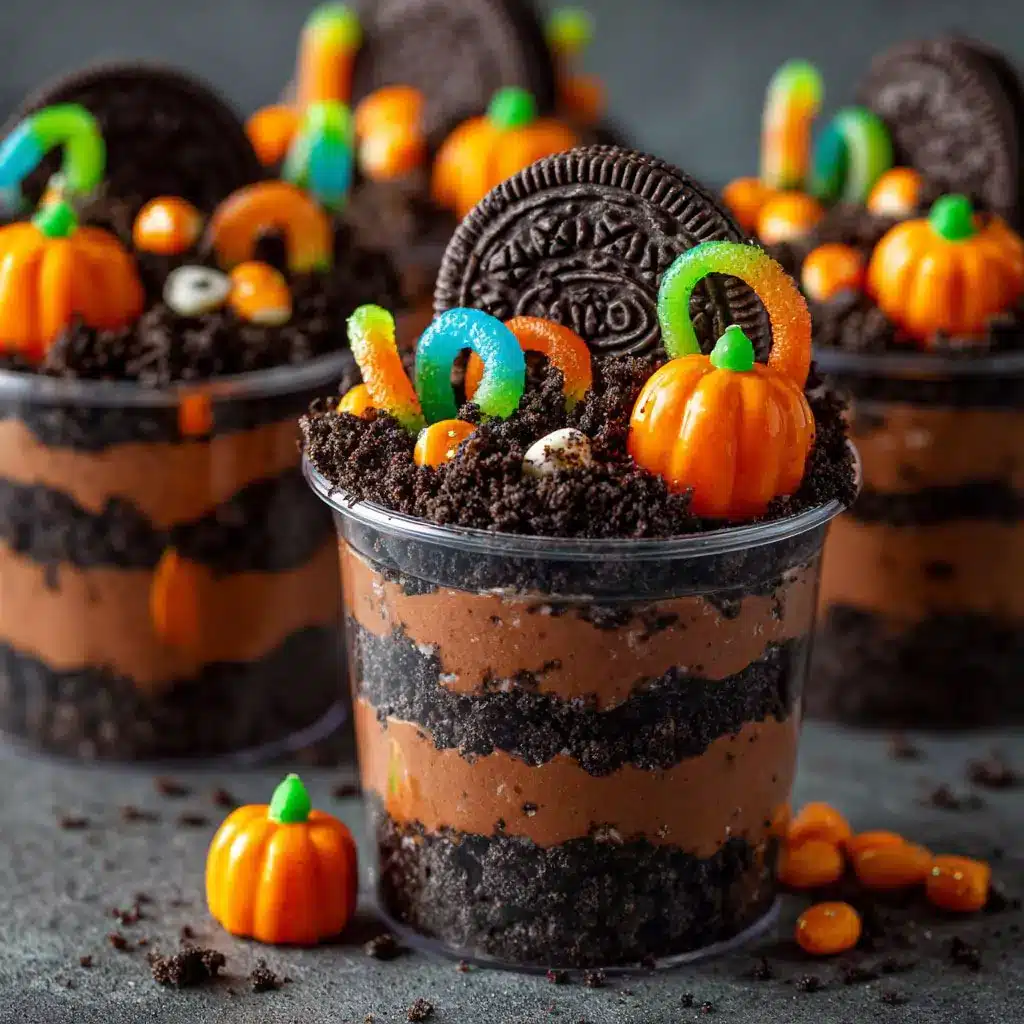
Halloween Graveyard Dirt Cups are a playful mix of spooky charm and sweet indulgence. Layers of rich chocolate pudding, crumbly Oreo “soil,” and gummy worms peeking out on top make them both a dessert and a Halloween decoration. These mini graveyard cups are fun, festive, and guaranteed to be a party favorite for kids and adults alike.
The creamy pudding base, blended with whipped topping, creates a smooth, mousse-like bite that contrasts perfectly with the crunchy Oreo crumble. For a finishing touch, decorate with Milano cookies as tombstones, piping on “RIP” for a realistic graveyard effect. Add gummy worms, candy pumpkins, or edible bones, and your dessert instantly becomes a spooky edible scene.
One of the best parts of this recipe is how simple it is to prepare. Since no baking is required, you can put a batch together in minutes — and it’s a great hands-on activity for kids to decorate their own cups. Plus, they’re easy to customize with different candies or toppings to match your Halloween party theme.
Why You’ll Love Halloween Graveyard Dirt Cups
There are so many reasons these Halloween Graveyard Dirt Cups will instantly become your go-to spooky dessert. First, they’re effortless to prepare — no oven needed — which means you can whip up a large batch in minutes. The combination of smooth chocolate pudding with fluffy whipped topping gives every spoonful a rich, mousse-like texture, while the crushed Oreo cookies add a fun crunch that perfectly mimics fresh “graveyard soil.”
Another reason to love them is how customizable they are. Whether you decorate with Milano cookie tombstones, gummy worms, candy pumpkins, or chocolate bones, each cup becomes a miniature haunted scene. They’re also an interactive treat since kids will love adding their own decorations, making this recipe a fun party activity as well as a dessert.
Best of all, these dirt cups are guaranteed crowd-pleasers. Both adults and children enjoy their playful presentation and indulgent taste, making them the perfect centerpiece for any Halloween celebration.
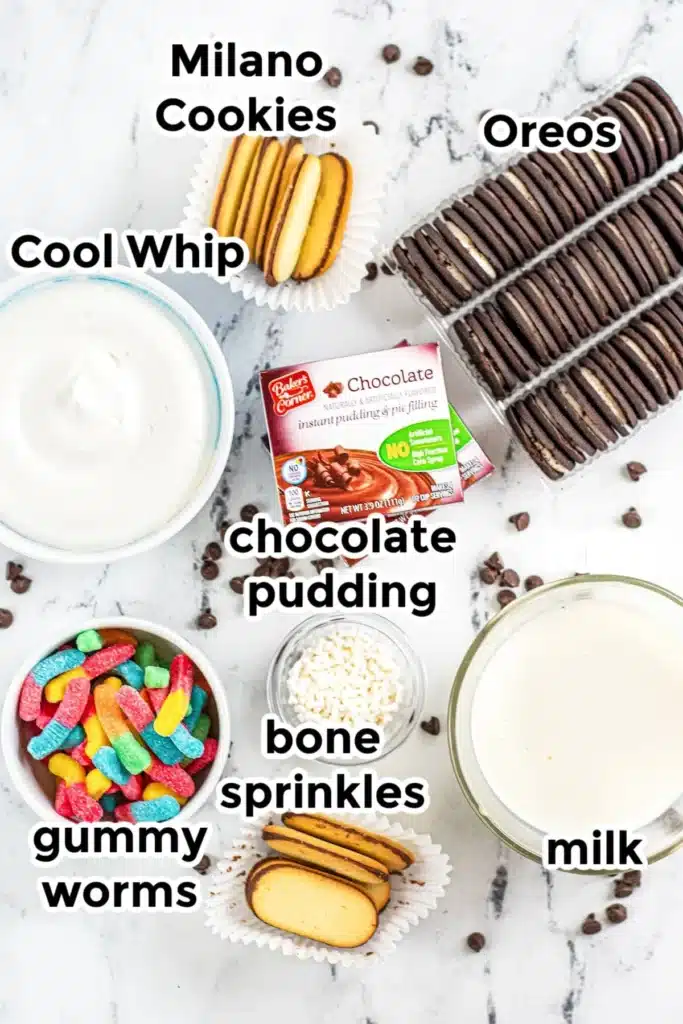
1 (14-ounce) package Oreo cookies, crushed into crumbs
2 (3.9-ounce) boxes instant chocolate pudding mix
4 cups cold milk
1 (8-ounce) tub whipped topping (Cool Whip), thawed
8 Milano cookies (or similar oval cookies)
Black gel icing or edible marker (for writing “RIP”)
Gummy worms, candy pumpkins, or candy bones for decoration
Instructions
Make the Oreo Dirt: Crush the Oreo cookies into fine crumbs using a food processor or by placing them in a zip-top bag and crushing with a rolling pin. Set aside.
Prepare the Pudding: In a large mixing bowl, whisk together the pudding mix and cold milk until smooth and thickened (about 2 minutes).
Fold in Whipped Topping: Gently fold the whipped topping into the pudding mixture until creamy and well combined.
Assemble the Cups: In 8 clear cups, layer Oreo crumbs on the bottom, followed by a layer of pudding mixture. Repeat the layers, finishing with Oreo crumbs on top to resemble “dirt.”
Make the Tombstones: Write “RIP” or spooky messages on Milano cookies using black gel icing or an edible marker. Insert one cookie into each cup to look like a tombstone.
Decorate: Add gummy worms crawling out of the “dirt,” candy pumpkins, or candy bones for an extra creepy effect.
Chill and Serve: Refrigerate for at least 30 minutes before serving to allow the layers to set. Serve chilled and enjoy!
Notes
You can swap Milano cookies for other cookies of your choice.
Customize decorations with seasonal candies for a unique look.
For added flavor, mix a pinch of cinnamon or espresso powder into the pudding mixture.
Perfect for Halloween parties, school events, or themed gatherings.
Nutrition
Serving Size:1 cup
Calories:310 kcal
Sugar:28 g
Sodium:170 mg
Fat:14 g
Saturated Fat:8 g
Unsaturated Fat:4 g
Trans Fat:0.5 g
Carbohydrates:42 g
Fiber:2 g
Protein:4 g
Cholesterol:20 mg
Ingredients
1 (14-ounce) package Oreo cookies – Use regular Oreo cookies for the best “dirt” effect. Crushing them finely will give the dessert a realistic soil texture. You can also experiment with flavored Oreos for a fun twist.
2 (3.9-ounce) boxes instant chocolate pudding mix – This creates the rich chocolate base. For a stronger flavor, choose double chocolate pudding mix.
4 cups cold milk – Cold milk helps the pudding set quickly and keeps the texture smooth.
1 (8-ounce) tub whipped topping (Cool Whip), thawed – This makes the pudding creamy and light, creating a mousse-like texture. For a healthier version, substitute with homemade whipped cream or Greek yogurt.
8 Milano cookies (or similar oval cookies) – These act as tombstones and add a realistic decorative element. You can also use rectangular cookies for variety.
Black gel icing or edible marker – For writing spooky “RIP” messages on your tombstone cookies.
Gummy worms, candy pumpkins, or candy bones – Decorative toppings that bring the creepy graveyard to life. Feel free to add edible spiders or Halloween sprinkles for extra effect.
Instructions Step-by-Step
Step 1 — Prepare the Oreo “Dirt”
Place Oreo cookies into a food processor and pulse until they are finely crushed. If you don’t have a processor, put the cookies in a large zip-top bag and crush them with a rolling pin until the texture resembles loose soil. Set aside the crushed cookies in a bowl. These crumbs will be layered throughout the cups to create the graveyard effect.
Step 2 — Make the Chocolate Pudding Base
In a large mixing bowl, pour in the cold milk. Add the chocolate pudding mix gradually while whisking vigorously to prevent lumps. Whisk for about 2–3 minutes until the mixture is thick and smooth. Let it sit for a few minutes so it sets slightly, which will make layering easier.
Step 3 — Fold in the Whipped Topping
Gently fold the thawed whipped topping into the pudding mixture using a spatula. This step should be slow and careful to keep the mixture airy. Folding ensures the pudding remains fluffy, giving your dessert a light mousse-like texture that contrasts perfectly with the crunchy “dirt.”
Step 4 — Assemble the Graveyard Dirt Cups
Select clear cups or small glass containers so the layers are visible. Start by spooning a layer of crushed Oreo crumbs into the bottom of each cup — about 2 tablespoons each. Next, add a generous layer of the pudding mixture (about ¼ cup). Repeat this layering process: Oreo crumbs followed by pudding mixture, finishing with a top layer of Oreo crumbs so it resembles freshly turned soil.
Step 5 — Create the Tombstones
Take the Milano cookies and, using black gel icing or an edible marker, carefully write “RIP” or other spooky phrases on each cookie. Insert one cookie into the pudding cup so it stands upright, giving the appearance of a gravestone in your edible graveyard.
Step 6 — Decorate Your Cups
Place gummy worms crawling out of the Oreo “soil” for a creepy effect. Add candy pumpkins or candy bones around the tombstone for extra Halloween flair. For an even spookier look, you can scatter edible spiders, candy eyes, or Halloween-themed sprinkles on top.
Step 7 — Chill Before Serving
Refrigerate the assembled cups for at least 30 minutes to let the pudding set completely. This chilling step ensures that the flavors blend and the dessert holds its shape. Serve chilled for best taste and presentation.
If you’re looking for more fun and festive drinks to pair with your baking, I’ve got you covered! Discover the magic and add a little sparkle to your next gathering with my Fairy Dust Shots, Mermaid’s Sparkle Punch, and Halloween Margaritas recipes. Each one is colorful, playful, and guaranteed to wow your guests—just click here to explore them all!
Variations for Halloween Graveyard Dirt Cups
1. Pumpkin Patch Cups
Transform your dirt cups into a mini pumpkin patch by adding candy pumpkins on top of the Oreo “soil.” Use green icing or frosting to pipe “vines” curling across the surface for a realistic effect. This variation adds a festive autumn touch and makes your dessert visually stand out at any Halloween gathering.
2. Ghostly Cups
Create a spooky, whimsical look by topping your cups with marshmallow ghosts. Simply place small marshmallows on top of the pudding layer and use a food-safe edible marker to draw ghost faces. Alternatively, white chocolate-covered pretzels shaped like bones make a creepy and delicious garnish.
3. Layered Flavors
Experiment with flavor combinations by substituting the chocolate pudding with vanilla, butterscotch, or even pumpkin spice pudding. This creates a unique contrast with the dark Oreo crumbs and adds depth to the dessert. Layer different puddings for a colorful, visually stunning effect.
4. Boozy Version
For an adult twist, stir a splash of Baileys Irish Cream, Kahlúa, or your favorite coffee liqueur into the pudding mixture before folding in the whipped topping. This adds richness and complexity to the flavor, turning your Graveyard Dirt Cups into a decadent treat for grown-up Halloween parties.
Conclusion
Halloween Graveyard Dirt Cups are more than just a dessert — they’re a fun, creative, and delicious way to celebrate the spooky season. With their creamy chocolate pudding, crunchy Oreo “dirt,” and playful decorations, they bring both flavor and festivity to any Halloween gathering. Whether you keep them simple or customize them with variations like pumpkin patches, ghostly toppings, or even a boozy twist, these cups are sure to impress your guests.
Best of all, they’re easy to make, require no baking, and are perfect for involving kids in the fun of decorating. So, this Halloween, skip the ordinary treats and bring a touch of creepy creativity to your table with Graveyard Dirt Cups. They’re guaranteed to be a highlight of your celebration — both tasty and unforgettable.